![(please configure the [header_logo] section in trac.ini)](/chrome/site/cardinal.gif)
Version Control
Subversion
About Subversion
From Wikipedia:
Subversion (SVN) is a version control system initiated in 2000 by CollabNet Inc. It is used to maintain current and historical versions of files such as source code, web pages, and documentation. Its goal is to be a mostly-compatible successor to the widely used Concurrent Versions System (CVS).
Subversion is well-known in the open source community and is used on many open source projects, including Apache Software Foundation, KDE, GNOME, Free Pascal, FreeBSD, GCC, Python, Django,Ruby, Mono, SourceForge.net, ExtJS and Tigris.org. Google Code also provides Subversion hosting for their open source projects. BountySource systems use it exclusively. Codeplex offers access to both subversion as well as other types of clients.
Subversion is also being adopted in the corporate world. In a 2007 report by Forrester Research, Subversion was recognized as the sole leader in the Standalone Software Configuration Management (SCM) category and a strong performer in the Software Configuration and Change Management (SCCM) category.[1]
Subversion is released under the Apache License, making it free software.
Subclipse for Eclipse
Subclipse is an Eclipse Team Provider plug-in providing support for Subversion within the Eclipse IDE. The software is released under the Eclipse Public License (EPL) 1.0 open source license. Using Subclipse we can fully integrate a subversion client in Eclipse.
If you are using the Cardinal provided VMWare development environment Subclipse is already installed.
Installing Subclipse
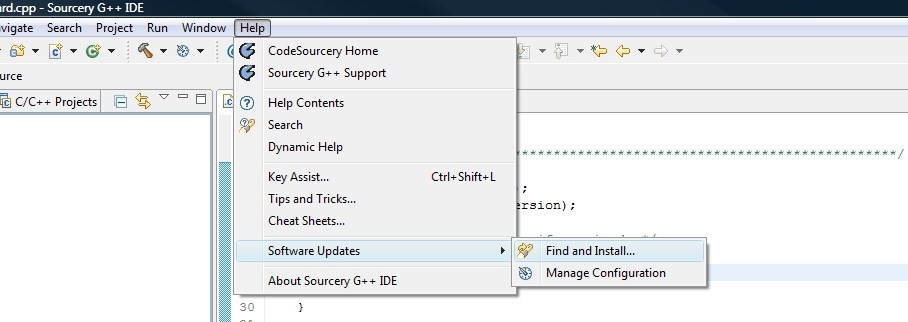
- Start Eclipse and choose Help -> Software Updates -> Find and Install.

- Choose Search for new features to install and press Next >.

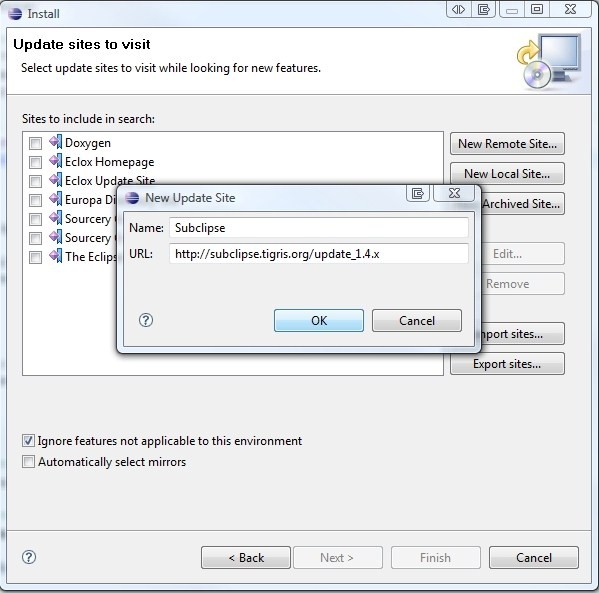
- Click New Remote Site..., enter the data in the screenshot, and press OK.

- Press Finish.

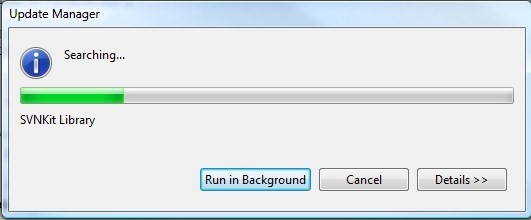
- Eclipse will search for updates.

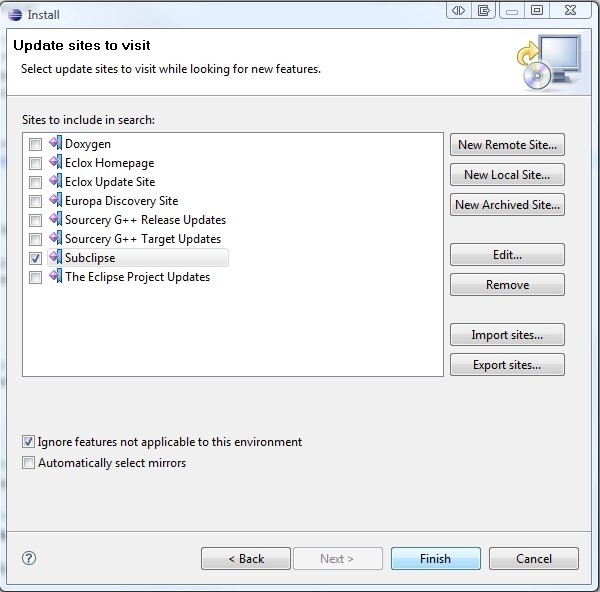
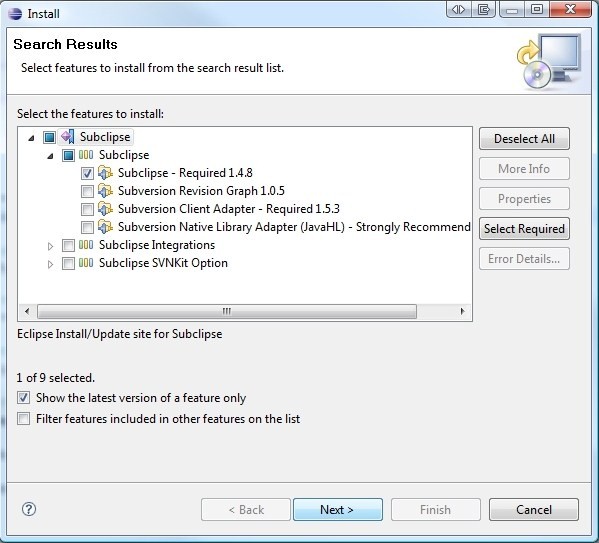
- Choose the selections shown in the screenshot and press Next >.

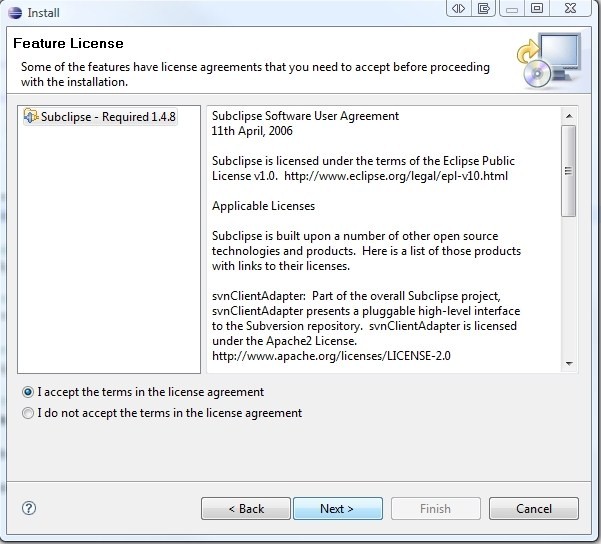
- Click I accept the terms in the license agreement and press Next >.

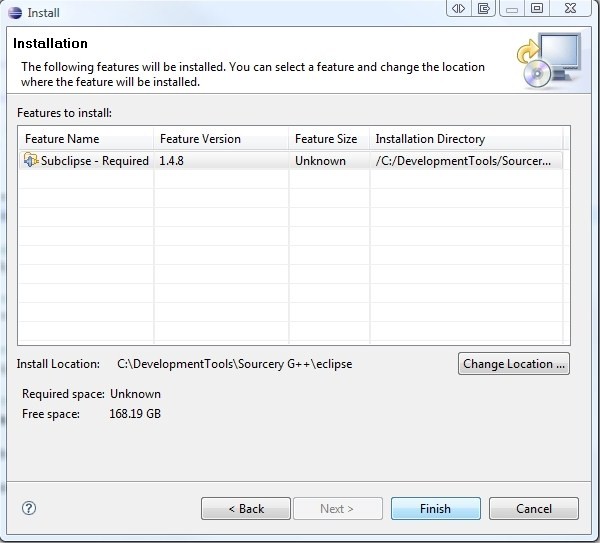
- Press Finish.

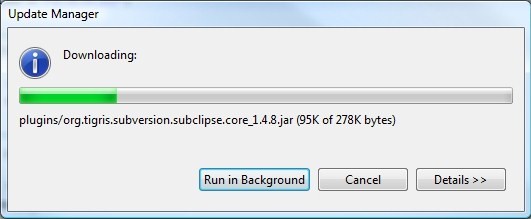
- Eclipse will download and install Subclipse.

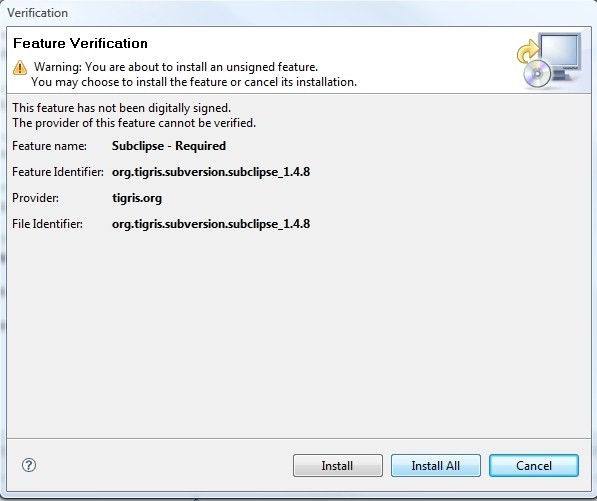
- Choose Install All when the dialog appears.

- Choose Yes when the dialog appears.

- Eclipse will restart and Subclipse is now installed.
Importing Projects Using Subclipse
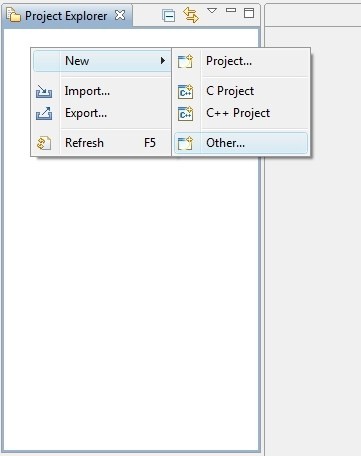
- Right-click in the Project Explorer and choose New -> Other

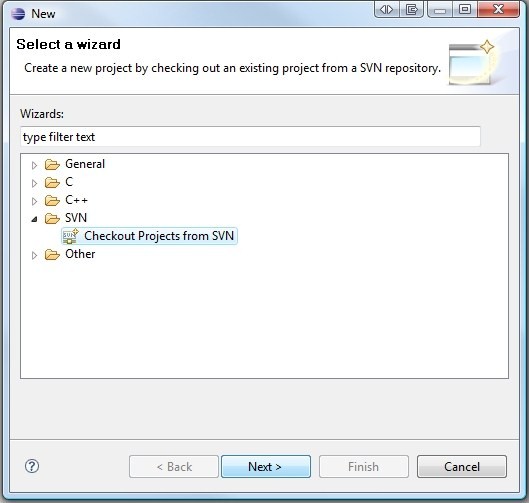
- Choose Checkout Projects from SVN under the SVN folder and press Next >.

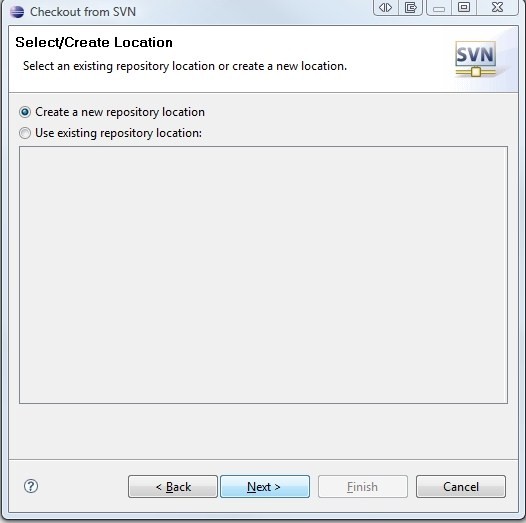
- Choose Create a new repository location and press Next >.

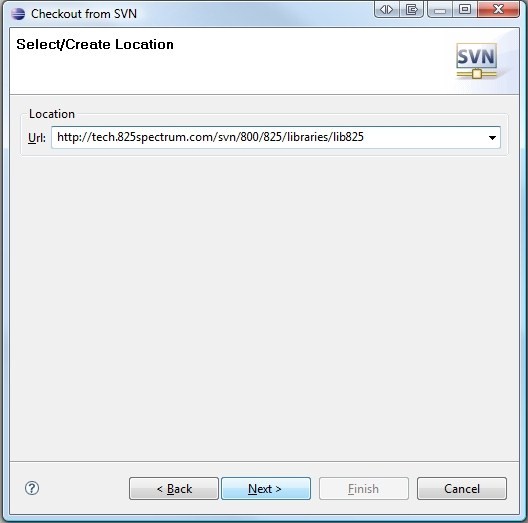
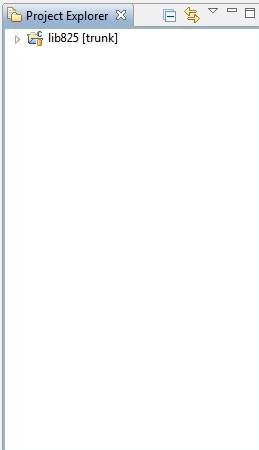
- Enter the SVN url in the Url: box. The screenshot shows a checkout of the lib825 project.

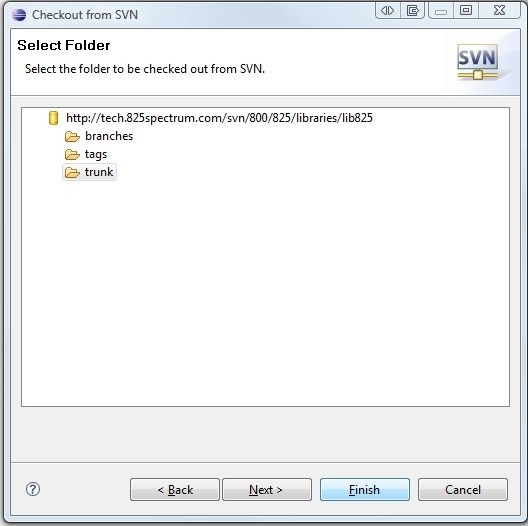
- Choose the trunk folder which is the folder that contains the latest source and press Finish. Alternatively, you could choose a sub-folder of tags which has previous release versions.

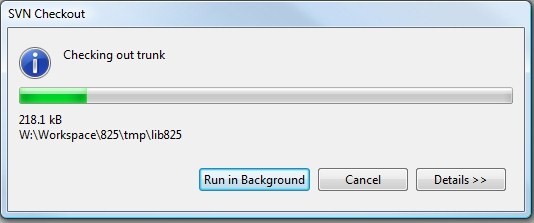
- The project will be checked out and imported into Eclipse.


Attachments (19)
- screenshot.1.jpeg (59.2 KB ) - added by 17 years ago.
- screenshot.2.jpeg (79.2 KB ) - added by 17 years ago.
- screenshot.3.jpeg (57.7 KB ) - added by 17 years ago.
- screenshot.4.jpeg (72.2 KB ) - added by 17 years ago.
- screenshot.5.jpeg (28.1 KB ) - added by 17 years ago.
- screenshot.6.jpeg (84.1 KB ) - added by 17 years ago.
- screenshot.7.jpeg (76.5 KB ) - added by 17 years ago.
- screenshot.8.jpeg (66.4 KB ) - added by 17 years ago.
- screenshot.9.jpeg (31.9 KB ) - added by 17 years ago.
- screenshot.10.jpeg (50.8 KB ) - added by 17 years ago.
- screenshot.11.jpeg (26.7 KB ) - added by 17 years ago.
- co_screenshot.1.jpeg (28.7 KB ) - added by 17 years ago.
- co_screenshot.2.jpeg (50.0 KB ) - added by 17 years ago.
- co_screenshot.3.jpeg (43.4 KB ) - added by 17 years ago.
- co_screenshot.4.jpeg (44.1 KB ) - added by 17 years ago.
- co_screenshot.5.jpeg (45.8 KB ) - added by 17 years ago.
- co_screenshot.6.jpeg (57.5 KB ) - added by 17 years ago.
- co_screenshot.7.jpeg (30.1 KB ) - added by 17 years ago.
- co_screenshot.8.jpeg (16.8 KB ) - added by 17 years ago.
Download all attachments as: .zip