![(please configure the [header_logo] section in trac.ini)](/chrome/site/cardinal.gif)
| Version 36 (modified by , 14 years ago) ( diff ) |
|---|
Updating an 825 indicator
If you have an indicator that is out of date and you want to do a complete upgrade follow the instructions below.
Configuring a USB flash drive for 825 updating
- Download the Cardinal 825 update pack. This is a zip file that contains all the files needed to upgrade your indicator to the latest software. Insert a USB flash drive into one of the USB ports on the computer.
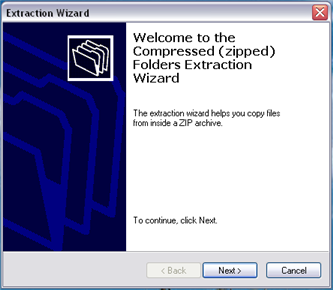
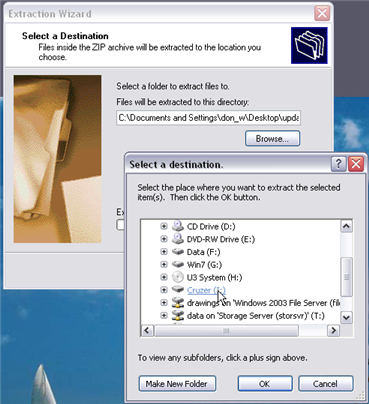
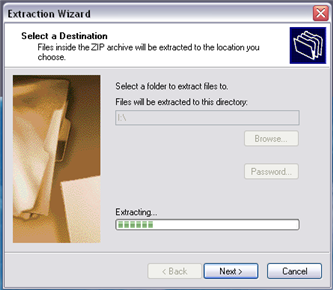
- Unzip the contents of the zip file to a USB flash drive. For example, if your flash drive is drive F: then you would unzip the contents of zip file to root directory of the F: drive. If you are using Windows XP right-click the zip file and select "Extract All..." Click "Next". Click "Browse..." Select "My Computer" and then select the appropriate drive letter of your flash drive. Click "OK." Click "Next". Click "Finish".


- After the files are unzipped you should have three files on your flash drive: "upd825.sh", "loadsrec", and "os825_xx_yy_zzz.825". If using Windows XP click the system tray icon to "Safely Remove Hardware" and select the appropriate item to remove the USB flash drive.

Performing a FULL Update
WARNING: BACKUP ANY FILES YOU WISH TO KEEP!
WARNING: Insure that reliable power is available before attempting the upgrade. A power interruption during the upgrade process could render the 825 inoperable and require return of the 825 to the factory for reprogramming!
- Make sure the 825 is powered off. Remove the four acorn nuts securing the bottom access cover and remove the cover to reveal the USB and network connections.
- Turn on the 825. Select "Application Mode". Watch the display carefully. When the display shows "U = Update" press the "U" button on the 825 keypad. (If "U = Update" does not appear your indicator may have an older OS - refer to "Updating just the OS" then repeat this process after the OS is updated).
- The display may prompt for a login. If the login has not been changed use the default administrator login: "ADMIN" and "81440".
- The display will show "Update from USB flash? (Y/N)". Press "Y".
- The display will show "Insert USB flash containing /upd825.sh - Press any key". Insert the USB flash drive previously configured for 825 updating. Be careful to insert it in the correct orientation into either of the USB slots. After the USB flash drive is properly inserted press any key such as the "ENTER" key on the 825 keypad.
- The display will show "Mounting USB flash" and if successfull will then show "UPDATE FLASH", "Replace:" and show "Loader", "OS", and "Main Bd" with "Yes" or "No" shown to the right of each. If they are not all showing "Yes" the Up/Down navigation keys may be used to highlight each item and press "Y" to change the selection to "Yes". Press ENTER. The display will show "Checking file CRC..." When finished it will show "* DO NOT TURN OFF POWER DURING UPDATE *" and "Proceed (Y/N)?". Press "Y" to proceed.
- The display will show counts as the update is performed. It may take 10 minutes or more. When finished the display will show "Done". Remove the USB flash drive. Press a key and the 825 will reboot.
- The display will show "Restarting" briefly and then the 825 startup screen will appear. The "Loader:" "OS:" and "Mainboard" version displays should show the correct updated version numbers.
Manual Reinstall of the OS
In case the OS is not functioning it may be necessary to perform an upgrade of the OS using a local network connection to a PC. If the existing OS is not functional it is not possible to use a USB flash to reinstall the OS. To update the 825 Linux kernel a tftpserver is required. Several tftp server programs are available. One that may be used for windows is tftpd32 http://tftpd32.jounin.net/.
1.Set up the tftpserver on your Windows computer. If you are using tftpd32 the default settings should work. It may be best to disable the additional server options, and only leave tftp enabled. Make sure the directory is set to the path that you have copied the “image.bin” file to.
2.Make sure the PC running the tftpserver and the 825 indicator are connected on the same network. It may be possible to use a crossover cable and only have the PC connected directly to the 825. It is preferable to use a simple network switch to connect the devices. This eliminates the problem that the PC may detect loss of entire network whenever power is removed from the 825.
3.Turn on the 825 indicator.
4.Select “Setup Menu”, “Communication”, and “Network”. Set “DHCP” to “No”. Set the “Client IP” to an IP address that is not in use by any device on the network, but similar to the PC address. For example if the PC address is “192.168.0.5” you may set the 825 to “192.168.0.8”. Set the “Netmask” to the same netmask as the PC, which is often “255.255.255.0”. The “Gateway”, “Broadcast”, and “Nameserver” may be set to “0.0.0.0”. You may verify the Windows PC settings by clicking “Start”, “Run” and type “Cmd”. At the command prompt type “ipconfig”. Press “ENTER” on the 825 to save changes. Press “ESC” to exit the “Communications” menu and return to the “Setup Menu”.
5.Select “Update Software Menu”. Select “Settings”. Set the “Server IP” to the IP address of the Windows PC running the tftpserver. Set “File Type” to “3” or “bin”. Set the “Filename” to “image.bin”. The prompts “1.” Through “6.” Allow a kernel command line to be specified. For example, if you want kernel messages to appear on COM2 to set “1.” to “console=ttyS1”. (“console=null” suppresses kernel messages, or blank provides kernel messages on “COM1”) Press “ENTER” to save changes.
6.Make sure everything is configured correctly and select “Download kernel to flash”. A warning message may appear. Press "Y" to proceed. The display will show “Downloading Image ‘image.bin’ from 192.168.0.5 (or the appropriate IP address of the server). This may take a few minutes as the kernel is downloaded into RAM. After a brief delay the display will show “DO NOT UNPLUG OR SWITCH OFF POWER”. The NOR flash area to contain the kernel will then be erased and the kernel will be written to flash. This may take several minutes. The display will show “Power off and back on”. (Older versions of the bootloader may show “Press any key”, but still require a power off and on).
7.Power off and on the indicator.
Version History
http://tech.825spectrum.com/trac/wiki/Docs/User/FullUpdate/VersionHistory
Attachments (4)
- welcome_compressed_files.png (37.4 KB ) - added by 16 years ago.
- zip_select_dest.png (109.1 KB ) - added by 16 years ago.
- zip_extracting.png (59.8 KB ) - added by 16 years ago.
- safely_remove_usb.png (3.2 KB ) - added by 16 years ago.
Download all attachments as: .zip