![(please configure the [header_logo] section in trac.ini)](/chrome/site/cardinal.gif)
| Version 15 (modified by , 16 years ago) ( diff ) |
|---|
Updating an 825 indicator
If you have an indicator that is out of date and you want to do a complete upgrade follow the instructions below.
Creating a USB flash for 825 updating
- Download the Cardinal 825 update pack. This is a zip file that contains all the files needed to upgrade your indicator to the latest software. Insert a USB flash drive into one of the USB ports on the computer.
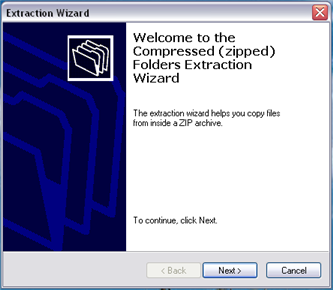
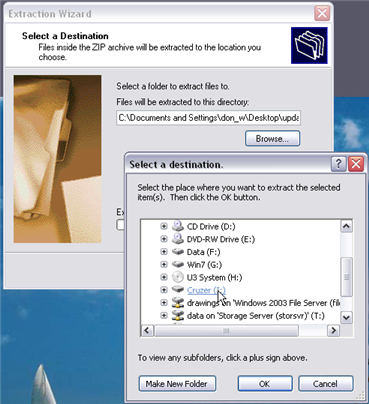
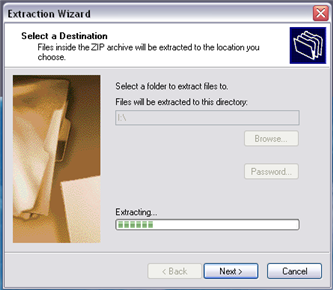
- Unzip the contents of the zip file to a USB flash drive. For example, if your flash drive is drive F: then you would unzip the contents of zip file to root directory of the F: drive. If you are using Windows XP right-click the zip file and select "Extract All..." Click "Next". Click "Browse..." Select "My Computer" and then select the appropriate drive letter of your flash drive. Click "OK." Click "Next". Click "Finish".


- After the files are unzipped you should have a several files and a subfolder named "nand" on your flash drive. If using Windows XP click the system tray icon to "Safely Remove Hardware" and select the appropriate item to remove the USB flash drive.

Clearing NAND and Performing a FULL Update
WARNING: This will overwrite all files on the 825. BACKUP ANY FILES YOU WISH TO KEEP!
WARNING: Insure that reliable power is available before attempting the upgrade. A power interruption during the upgrade process could render the 825 inoperable and require return of the 825 to the factory for reprogramming!
- Make sure the 825 is powered off. Remove the four acorn nuts securing the bottom access cover and remove the cover to reveal the USB and network connections.
- Turn on the 825. Select "Application Mode". Watch the display carefully. When the display shows "U = Update" press the "U" button on the 825 keypad. (If "U = Update" does not appear your indicator may have an older OS - refer to "Updating just the OS" then repeat this process after the OS is updated).
- The display may prompt for a login. If the login has not been changed use the default administrator login: "ADMIN" and "81440".
- The display will show "Update from USB flash? (Y/N)". Press "Y".
- The display will show "Insert USB flash containing /upd825.sh - Press any key". Insert the USB flash drive previously configured for 825 updating. Be careful to insert it in the correct orientation into either of the USB slots. After the USB flash drive is properly inserted press any key such as the "ENTER" key on the 825 keypad.
- The display will show "Mounting USB flash" and if successfull will then show "Clearing NAND", "Creating directories", "Copying..." This may take several minutes.
- When finished the "File Manager" display may appear. Press "SHIFT" then "ESC" on the 825 keypad. The "Application Menu" should appear.
- Press the "Left Arrow" navigation key. The display will show "Return to Startup?" Press "Y" and "ENTER". The display will show "Restarting" briefly and then the 825 startup screen will appear. The "Loader:" "OS:" and "Mainboard" version displays should show the correct updated version numbers.
Updating just the OS
- Make sure the 825 is powered off. Remove the four acorn nuts securing the bottom access cover and remove the cover to reveal the USB and network connections.
- Turn on your 825. Select "Application Mode". Wait for the "Application Menu" to appear.
- If the "File Manager" option is not present in the menu select "Configuration". The display may prompt for a login. If the login has not been changed use the default administrator login: "ADMIN" and "81440". Select "Configure menu". Select "Enable/Disable menu items". Select "File Manager" and press "Y" to select "Yes" to include this in the menu. Press "ENTER". Press the "Left arrow" navigation key twice to return to the "Application Menu".
- Insert the USB flash drive. Be careful to insert it in the correct orientation into either of the USB slots.
- Select the "File Manager" option in the "Application Menu". The display may prompt for a login. If the login has not been changed use the default administrator login: "ADMIN" and "81440".
- Press "P" for paths to select the paths for the file manager to display. At the "1:" prompt type: "/mnt/fl1" (without the quotes - press "SHIFT" twice to lock in lower case mode). Press "ENTER".
- The left side of the display should show "/mnt/fl1" and the contents of your flash drive. If the files do not show the path may have been typed incorrectly. Repeat the previous step.
- Press the "DOWN" navigation key repeatedly until the OS file "image.bin" is highlighted. Press "ENTER".
- The display will show "Are you sure you want to flash selected files. - Confirm No". Press "Y" to select "Yes" and press "ENTER".
- The display will show "Update FLASH" and prompt whether to replace the existing OS version with the version of the image.bin file. If the version number is correct press "Y" to proceed.
- The display will show "Erasing" and then count through all records as the file is being programmed. This may take a few minutes.
- When finished the display will show "Done". Press "ENTER". The file manager will return. Press the left navigation key until the display shows "Return to Startup?". Press "Y" and "ENTER". The display will show "restarting" and the the startp screen should show with the correct "OS" version that the indicator was updated to.
Attachments (4)
- welcome_compressed_files.png (37.4 KB ) - added by 16 years ago.
- zip_select_dest.png (109.1 KB ) - added by 16 years ago.
- zip_extracting.png (59.8 KB ) - added by 16 years ago.
- safely_remove_usb.png (3.2 KB ) - added by 16 years ago.
Download all attachments as: .zip
Note:
See TracWiki
for help on using the wiki.