| Version 7 (modified by , 14 years ago) ( diff ) |
|---|
Installing Custom Applications
This guide is intended to show the user how to install custom applications in the Cardinal 825 Digital Weight Indicator. There are several methods available to copy a file to the indicator but this guide will cover using the file manager and a USB drive. Other methods only differ in getting the data to the indicator. Finally, this guide will show you how to create a custom menu item for your application.
Requirements
- A way to copy files to the indicator. A USB thumb drive with the File Manager application OR access to the indicator's remote file manager using your internet browser.
- A custom application.
Installing Your Custom Application
- Insert your thumb drive with the application.
- Load the file manager.
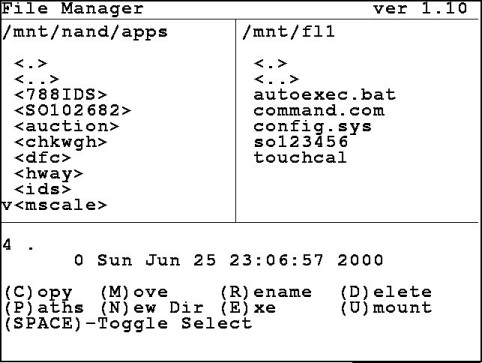
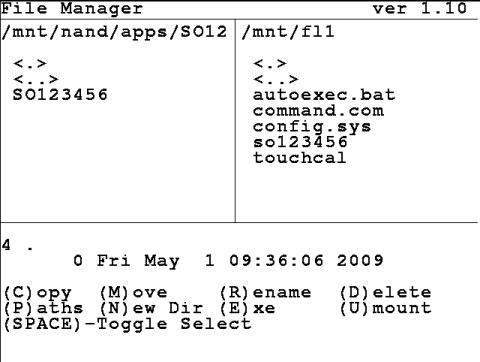
- Change the left path to /mnt/nand/apps and the right path to /mnt/fl1. Your screen should be similar to the screenshot below.
- With the highlighted section on the left press the N key for (New) Dir.
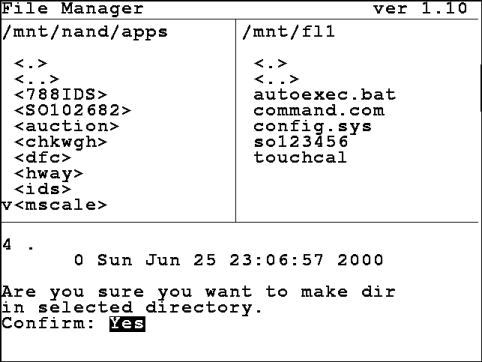
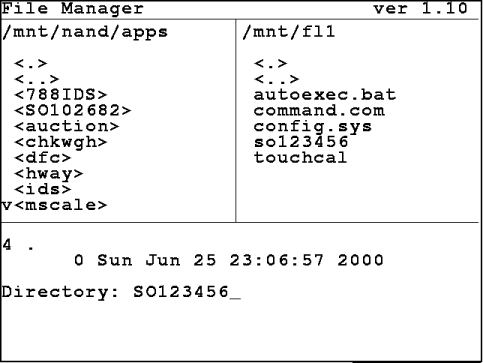
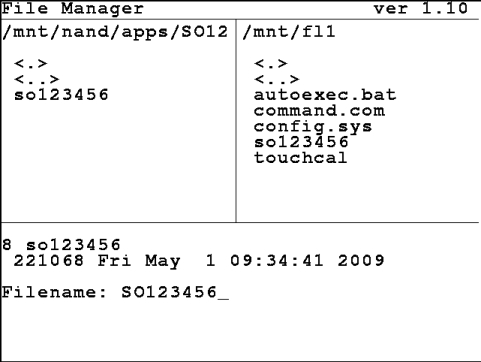
- Press Y and then ENTER. Enter the name of the sales order and press ENTER.
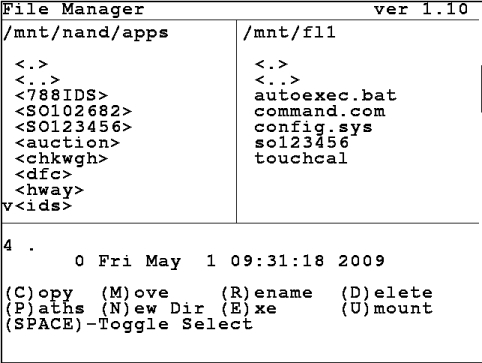
- You should see the new directory listed in the left side of the file manager.
- Next, highlight the directory you just created and press ENTER.
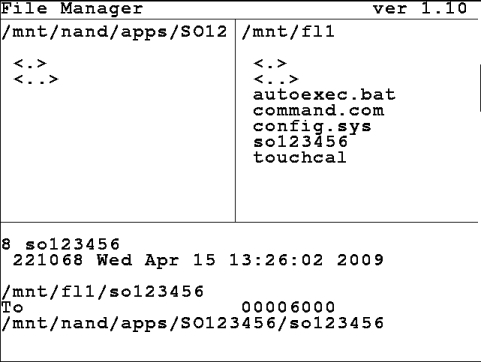
- Now, move the cursor to the right side (/mnt/fl1) and choose the custom application. Press C for (C)opy and then Y and ENTER to confirm.
- When copying files from Windows to Linux the file names are sometimes converted to uppercase. If this happens choose the file on the left and press R for (R)ename. Change the name to lowercase.
- Finally, highlight the file and press the E for (E)xecute. Press Y and ENTER to confirm.
Creating Custom Menu Item
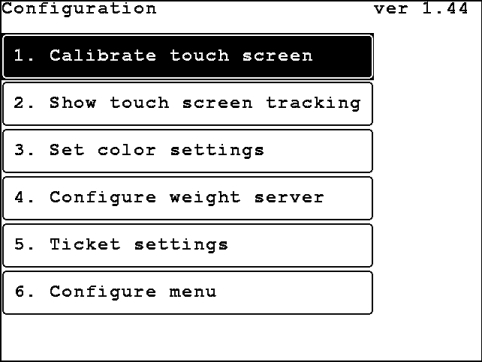
- Choose the Configuration option from the main menu.
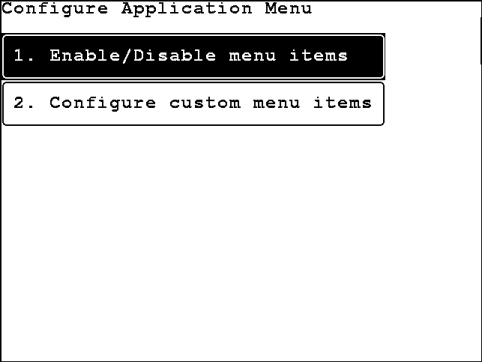
- Choose option 6. Configure menu.
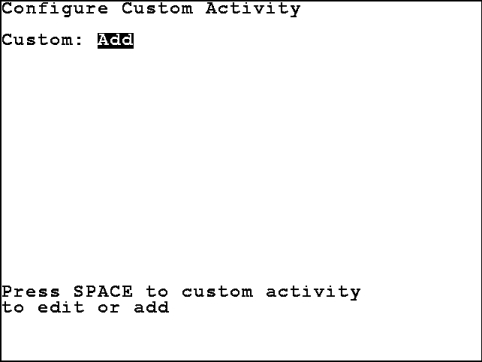
- Choose option 2. Configure custom menu items. Press SPACE to toggle until Add is shown.
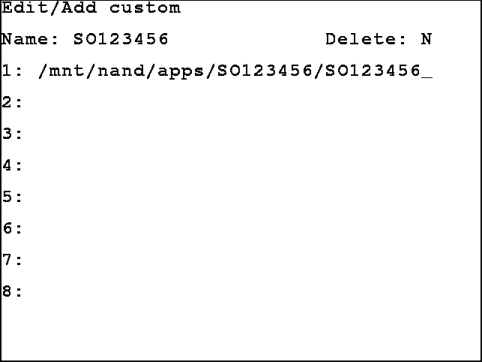
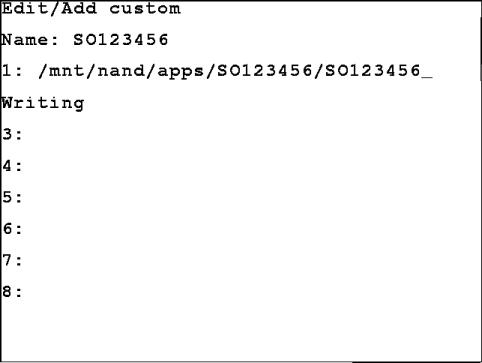
- Give your menu item a name and type in line 1 replacing SO123456 with the name of the 825 application. Press ENTER when finished to save the changes.
- Press ESC and you will be brought to the Configure menu screen. If you hit ESC too many times you can access this from the main configuration screen by choosing option 1. Enable/Disable menu items.
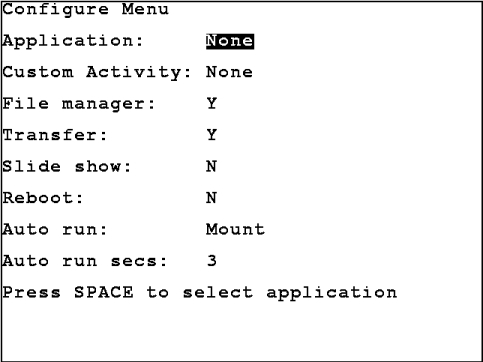
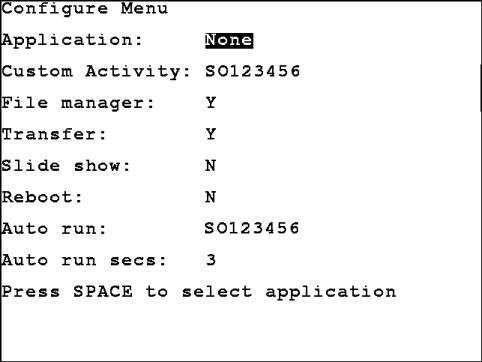
- Under Custom Activity press SPACE to toggle the selection until you see your application entered above. As an optional step, you can toggle the Auto run: prompt to allow the application to run automatically on startup.
- Congratulations! You should now be able to start your application from the main menu.
Attachments (23)
- screenshot.1.jpeg (53.5 KB ) - added by 17 years ago.
- screenshot.2.jpeg (77.9 KB ) - added by 17 years ago.
- screenshot.3.jpeg (69.0 KB ) - added by 17 years ago.
- screenshot.4.jpeg (83.0 KB ) - added by 17 years ago.
- screenshot.5.jpeg (64.9 KB ) - added by 17 years ago.
- screenshot.6.jpeg (68.7 KB ) - added by 17 years ago.
- screenshot.7.jpeg (57.2 KB ) - added by 17 years ago.
- screenshot.8.jpeg (68.4 KB ) - added by 17 years ago.
- screenshot.9.jpeg (66.3 KB ) - added by 17 years ago.
- screenshot.11.jpeg (61.5 KB ) - added by 17 years ago.
- screenshot.12.jpeg (34.3 KB ) - added by 17 years ago.
- screenshot.13.jpeg (28.3 KB ) - added by 17 years ago.
- screenshot.14.jpeg (30.8 KB ) - added by 17 years ago.
- screenshot.15.jpeg (13.7 KB ) - added by 17 years ago.
- screenshot.16.jpeg (51.4 KB ) - added by 17 years ago.
- screenshot.17.jpeg (22.0 KB ) - added by 17 years ago.
-
filemgr1.png
(13.2 KB
) - added by 13 years ago.
File Manager opening screen
-
filemgr_ins_usb.png
(10.3 KB
) - added by 13 years ago.
File manager - insert USB flash
-
filemgr_choose_file.png
(13.5 KB
) - added by 13 years ago.
File manager - choose file
-
filemgr_menu_name.png
(2.2 KB
) - added by 13 years ago.
File manager - prompt for menu name
-
filemgr_new_custom.png
(9.3 KB
) - added by 13 years ago.
File manager - new menu item added
-
app_menu.png
(13.3 KB
) - added by 13 years ago.
App menu with new custom item
-
filemgr_replace.png
(20.2 KB
) - added by 13 years ago.
File manger - replace custom application
Download all attachments as: .zip
Note:
See TracWiki
for help on using the wiki.
![(please configure the [header_logo] section in trac.ini)](/chrome/site/cardinal.gif)
